Thursday, October 7, 2010

Techniques of How to Record Band Members

     There are multiple ways of when to record the instruments of your band. None are wrong, but some sound better than others. One method of recording is to record everyone except the vocals at the same time. This will give you what people call a "live sound". Using this technique it is very difficult to manipulate since the sound from the other instruments are bleeding into your recording. This is the most simple but it also gives you the least quality recording since you can't improve on each specific part when editing.
     The other, better quality, way of recording is to record each person separately. In most studios this is the preferred way because the rooms are small and dedicated to each type of instrument. The pros of recording one at a time is that they can redo a performance easily without having to deal with getting the band back in sinc. Also, now you can reap the benefits of easily editing each specific sound with every minute detail without having extraneous sound. The cons of this type of recording is it takes much longer to finish the song. Also, it might be hard for the people playing because it might be hard for them to keep in time with the rest of the band while just listening to them through headphones rather than live where there is chemistry.

Techniques of Using/Placing Microphones

     Most bands starting out have just one or maybe two microphones for each instrument. When you listen to the playback and compare it to a professional recording, such as a band on I-tunes, the difference is monumental. Most people would just accept that their expensive equipment and studio is the reason that the average garage band doesn't have as good sound. Well you would happy to know that it's not always that case. One way of boosting your sound presence and overall quality is to use maybe three or four different kinds of mics placed at varying distances and angles. The combination of microphones usually consists of a condenser, dynamic, and ribbon microphone. Each of these are specially made to detect varying levels of tone. The mix of these mics will create a well balanced sound that isn't too tinny or too deep.
     This combination of microphones is usually used on guitar and bass guitar amplifiers. However it has been known to use different mics on drums and/or singing too. For instance, the snare drum might have three mics on order to pick up the light and soft hits, the deep tone, and the high pitched snap when it's hot hard. Again the purpose of all the mics is to create a well rounded sound. Just be creative and see what fits the specific sound type of the band. Remember nothing is wrong, only misplaced.

Thursday, September 30, 2010

The Mixing Board

     The Mixing Board also known as a Mixer has been used in every song you've ever heard on your I-pod or on the radio. Its purpose is to level out or enhance all of the different elements of the music to make it flow together. It would be obvious is a mixer was not used on a song because one instrument would always be overpowering the other and would just be a jumble of sound that nobody wants to hear. If you have ever seen a mixer it has hundreds of knobs depending on how big or how many instruments you are planning on recording. Each knob has different effects on the individual sound. A mixer has the ability to change the volume, tone, presence, and special effects on the individual track. A mixer can have from two to 200 or more channels so there is a lot of choices. I am planning on eventually buying a four or six channel mixer called the  Peavey PV6 usb mixer because I just need something small and portable. Plus, anything nicer than this could cost about $400 or more. This one costs $130 which is already a decent price.

The Interface

     Many whom have not recorded before, semi-professionally, many not know what a Digital Recording Audio Interface is. Well it's actually not that complex. The so called interface is used to convert sound, which is inputted to it my means of a microphone or guitar cable, into a "digital code" so it can be uploaded to your computer. The music has to be converted into a digital code because otherwise it won't be in a language in which a computer could understand and process. Usually an Interface will be relatively small like a metal box, not weighing more than 3lbs. The basic ones have controls like volume for each mic, volume for the playback, and an indicator to let you know if it's too loud or too quiet. I personally own the Tascam us-122 Interface which is a descent choice if you want to be basic. It cost me $99.99 which is about the cheapest that they go for. If you want a more upgraded one I suggest the Digidesign M box 2 which is $350 brand new but you can get them for about $200 on Ebay. The M box has high sound quality and many features but there is a downfall. The M box only works with the Pro Tools recording software which is no problem if you already have it but is a hassle for someone who doesn't since it's pretty pricey.

Thursday, September 23, 2010

The Recording Software

     No matter who you are or how much money you have, if you are going to record something you are going to need to choose a specific recording software. The prices range from $30 to $200 but you really don't want to purchase anything less than $65 because the others do not have the proper features and are known for their glitches. Buying software really is a personal favorite depending on what kind of set up you like. The main brands are Pro Tools, Mixcraft, and Audacity. I have Mixcraft 4.5 because the format is much easier to understand than other programs. In this specific program they give you the ability to adjust the volume of each track and add effects while the song is playing like most quality programs. What sets this one apart from the others is it's much more simple to add effects to the music because it's just a couple of clicks to add something unlike Pro Tools where you have to click a million icons before you get to select what you want.
     Pro Tools is also another well respected recording program. It is also the most used in professional recording studios around the globe. This software will run you about $100 to $150 depending on what version you get and what comes with it. Pro Tools is good because it has more customizing features than any other product out there. The combinations are almost endless. The down side is people say that  it might be difficult to learn because of all the options. This program also is only compatible with certain interfaces like the M-box which limits your choices when it comes to the equipment you use.

Recording Drums

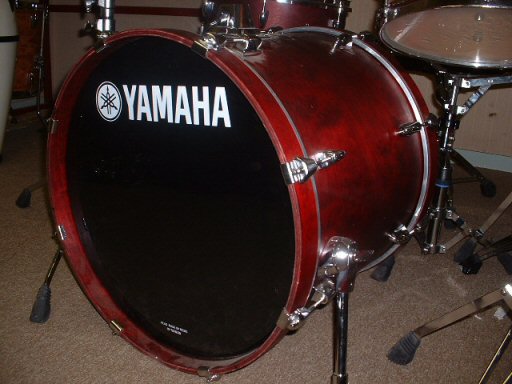
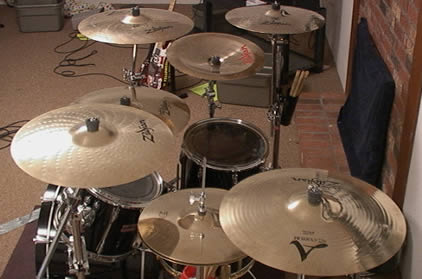
     Up to now I have mentioned how to record using a single microphone for either a singer or a guitarist. This time you will learn how and what to use to record a standard drum set. Initially, it's obvious that there are many more things to put a mic to than on an amp so you will need many more mics. The key to this is to make a decision as to what parts you want to hear most clearly. A professional drum recording can have up to 10 mics but that's not necessary. All that's needed is three to four mics which covers the snare, bass drum, cymbals, and possibly a high or floor tom. There are specially made mics to record drums but a set can cost about $300. Because bands are always on a budget I came up with a cheap solution. Instead of using regular dynamic mics, I use three Guitar Hero or Rock Band mics from the video game. I had my doubts at first but they actually work pretty good. If you look on the back of them they say Logitech USB which means they are actual mics, all you have to do is plug them straight into your computer.
     Now the secret to them sounding good is the positioning and presentation. I recommend going to Radio Shack and picking up a few Windscreens which look like soft foam balls that go over the microphone. This reduces the air coming out of the drums and creates a warmer sound in the recording. The positioning of the mics can get a little tricky depending on the amount of space available. It will be a lot of trial and error to get your desired sound. The general location to place each mic is one towards the edge of the snare but still pointing at the center. The next one will go either inside the bass drum sitting on top of pillows or just outside the hole. The third one should be on a boom arm stand facing towards the cymbals that are being used most in the song but far enough away to reduce distortion.

Tuesday, September 14, 2010

The Vocal Microphone and Methods of Recording Vocals

     Another important factor when recording your musical masterpiece is the type of vocal microphone you use. There are two types, Dynamic and Condenser. Dynamic mics are usually used for live performances or recording the guitars. Condenser mics are ideal for vocals because of ther sensitivity and mid to high range of sound detection. For someone on a budget the MXL 990 Condenser Microphone with Shockmount is the perfect mic especially since its only $79.99. If you think that is a lot of money than just consider the fact that most condenser mics are $149.99 and up.

MXL mic with pop filter
      Now that you know a good mic to use it would be wise to take advice on different atmospheres to record. The ideal position of a vocal recording would be in a small room with acoustic foam covering the walls to reduce the reverb which could cost arount $1,500. Since most people can't afford that, people have come up with alternatives that still have the same effect. One method would be to go in a roomy closet and, if you can, purchase a $20 Foam Mattress Topper to cover some of the walls around you. Finally if that is too much money or effort you can find the most enclosed room in your house and get a pop filter which will reduce the popping sound of the p's and t's in the song. You will place this pop filter between the singer and the microphone.